~10 Extensions~
6/24/2024
Change your two Paragraph tags to be different
Change the name of your nested paragraph in main.scss file
The new code representing the .main class
Test the extended copied styles
To add additional styles to the second class
Turn on Watch SASS
What is an Extension?
In SCSS, we can extend an element. This is basically what is called inheritance in other languages. And so, in SASS, if we are to extend an element, that element would then inherit all of the styles from the parent element.
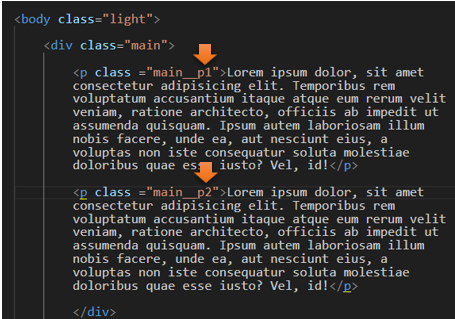
Change your two Paragraph tags to be different
Go to your index.html file.
Change the classes on our two paragraphs to be different from one another.
Now Remember as soon as you make this change to your paragraphs, all of the other tutorials that we have done before, which rely on these two paragraphs being named the same thing, will no longer be working.
So, if you need to go back to another tutorial, remember this part might need to be changed back.
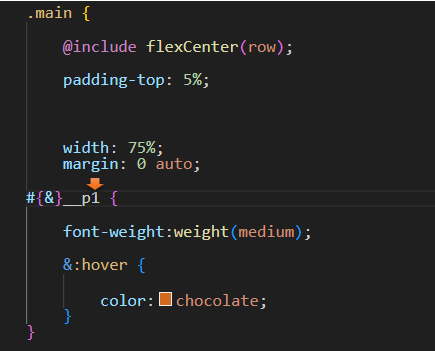
Change the name of your nested paragraph in main.scss file
Next go into the .main class, in your main.scss file, and change this (#{&} __p, to be p1
Warning, the same part with this section here, if you need to go back to a previous tutorial. This p1 will need to be changed back to p.
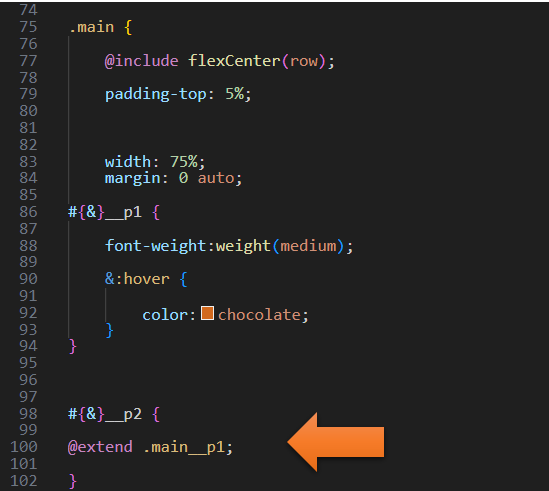
So, now we will be extending all of the styles of p1 onto p2. This way we could change one or two things on p2 without having to re-type all of the styles, especially if the 2 paragraphs will have some of the styles being duplicated in code. This is a more efficient way of approaching things.
We will be adding some new code here for p2 to represent the second paragraph.
Warning, once again, this is added code and will need to be removed if trying to get a previous tutorial to work.
#{&}__p2 {
@extend .main__p1;
}
The new code representing the .main class
Now start writing this nested paragraph code to represent p2
.main {
@include flexCenter(row);
padding-top: 5%;
width: 75%;
margin: 0 auto;
#{&}__p1 {
font-weight:weight(medium);
&:hover {
color:chocolate;
}
}
@extend .main__p1;
}
If you test your code now you will find that both paragraphs will behave exactly the same, because we have not made any new changes to p2, we have merely copied all of the styles onto it from p1
Test the extended copied styles
Go to index.html to test the styles

...and you should find that both paragraphs are behaving the same. See, copied code here that is all we have managed to do so far.
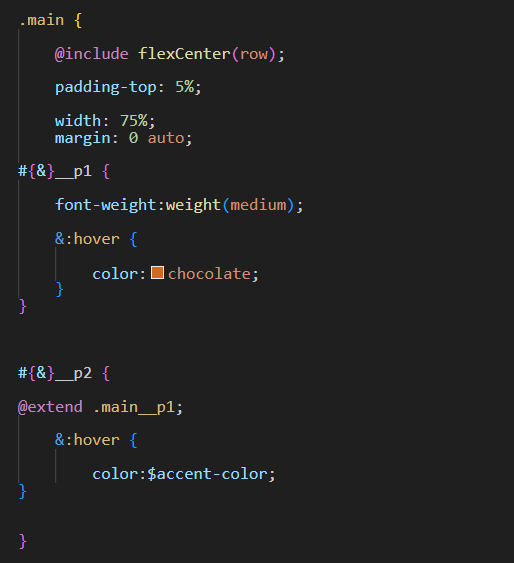
To add additional styles to the second class
This is simple, once we have copied p1 into p2 using @extend, we can just write the additional rules that we want our p2 to be able to file.
.main {
@include flexCenter(row);
padding-top: 5%;
width: 75%;
margin: 0 auto;
#{&}__p1 {
font-weight:weight(medium);
&:hover {
color:chocolate;
}
}
#{&}__p2 {
@extend .main__p1;
&:hover {
color:$accent-color;
}
}
Test the extended styles
Go to index.html to test the styles
And it is listening to our new extended style that we gave the hover in the second paragraph
